5 Tips for Natural-Looking Outdoor Photo Sessions
When I first started shooting portraits, I booked almost everything in a studio. The controlled light, the predictable background, the ability to tweak every detail before the shutter clicked. It felt safe. But over time I noticed something in my edits: the same poses, the same shadows, the same slightly stiff smiles. People looked good but they didn't look like themselves. That is when I started moving my work outside, and it changed everything.
Outdoor photo sessions bring a different kind of energy. The light shifts, the wind moves, the subject has to engage with the environment rather than a backdrop. It is less predictable, yes, but the results often carry a warmth and authenticity that studio work struggles to match. Whether you are a photographer looking to improve your craft or someone preparing for their own shoot, understanding how to make the most of these sessions is worth the effort.
Why Go Outside?
The biggest advantage of working outdoors is variety. A single location can offer multiple looks just by moving a few feet. One minute you are in open shade under a tree, the next you are stepping into golden hour light that wraps the subject like a soft filter. You do not need to carry and swap backdrops or adjust strobes. The world provides the set, and your job is to read it and place your subject well.
There is also the matter of comfort. Most people are not professional models. Put them in a small room with a hot light and a reflector in their face, and they tense up. Put them in a park, a field, or a quiet street, and they relax. They move more naturally. They laugh without forcing it. That is the moment you want to capture, and it happens more often when people feel at ease in their surroundings.
Light: The Real Variable
Outdoor photo sessions depend heavily on your ability to read natural light. Midday sun is harsh and creates dark shadows under the eyes and chin. Overcast days are actually easier in many ways because the clouds act as a giant diffuser, softening shadows and reducing contrast. If you have to shoot in bright sun, look for open shade: the north side of a building, under a wide tree canopy, or even the shadow side of a fence. That soft, even light is far more flattering than direct sunlight.

Golden hour, the period just after sunrise or before sunset, is famous for a reason. The light is warm, directional, and low, which creates depth and texture. But it also passes quickly. You have maybe thirty to forty minutes of prime light, so plan your key shots around that window. Scout the location beforehand so you know exactly where to position your subject when the light hits right.
Location Choices Matter More Than You Think
Not every outdoor spot works for portraits. A busy urban street can be distracting, with cars, signs, and pedestrians pulling attention away from the subject. A wide open field with no texture can feel empty. Look for locations that offer layers: a foreground element like flowers or grass, a midground where the subject stands, and a background that adds context without competing. Tree lines, old barns, winding paths, and waterfront areas all provide natural framing and visual interest.
Another thing to consider is the season. Spring offers fresh greens and blooming flowers. Summer gives you long days and lush foliage but also harsh midday light and heat. Fall brings rich colors and softer light. Winter can be tricky with shorter days and bare trees, but snowy landscapes or evergreen forests create a clean, moody look. Each season demands different preparation, from clothing choices to backup plans for weather.
Practical Tips for the Day of the Shoot
Preparation makes the difference between a stressful session and a smooth one. Here are a few things I have learned from years of shooting outdoors:
- Check the weather forecast the night before and the morning of. Rain, high wind, or sudden cloud cover can change your approach. Have a backup location or a rain date in mind.
- Bring a reflector. It is small, light, and can bounce light into shadows or add a catchlight to the eyes. Even on overcast days, a white reflector can add a subtle lift.
- Dress the subject in colors that complement the environment. Avoid large logos or busy patterns. Solid tones or soft textures usually photograph better against natural backgrounds.
- Plan for movement. Walking, turning, leaning against a tree, or sitting on a rock all create natural poses. Stiff standing shots rarely look good outdoors. Let the subject interact with the space.
- Keep extra time for adjustments. If you arrive early, you can walk the area and find the best spots. If you run late, you lose the best light. Build in a buffer.
These details may seem small, but they add up. A well-prepared session leaves room for spontaneity, and that is where the real magic happens.
Connect with us on Pinterest.
Working with Groups and Families
Group shots outdoors bring their own challenges. You have multiple people to arrange, each with their own comfort level and attention span. Kids especially struggle to stand still for long. The key is to keep things moving. Have the family walk toward you, then stop and turn. Ask them to look at each other and talk. Capture the candid moments between the posed ones. Those often end up being the favorites.
For family portraits, choose a location with some depth so you can stagger the group. Standing everyone in a straight line looks flat. Place parents slightly behind children, or have the family sit on a slope or steps. This creates a more natural composition and keeps everyone in focus at wider apertures.
Gear Considerations
You do not need a bag full of expensive lenses to shoot great outdoor portraits. A fast prime lens, something in the 35mm to 85mm range, is often enough. It lets in more light, gives you control over depth of field, and forces you to move around and find your composition rather than zooming from a distance. If you shoot with a zoom, keep it at the longer end for single portraits to compress the background and separate the subject.
A tripod is rarely necessary unless you are shooting in very low light or want to include yourself in the frame. Instead, invest in a good strap and comfortable shoes. You will be walking, crouching, and moving constantly. Being physically comfortable lets you focus on the creative decisions.
Editing with a Light Touch
Post-processing for outdoor images should enhance what was already there. Overediting can kill the natural feel you worked to capture. Adjust exposure and white balance first. Then consider a slight contrast boost or a subtle tone curve to add depth. Skin tones should remain natural, not overly smoothed or saturated. If you shot in raw, you have plenty of latitude to recover highlights and shadows without making the image look artificial.
One common mistake is to overdo the sky. A deep blue sky or dramatic sunset can be beautiful, but if it distracts from the subject, pull it back. The subject should always be the focal point, not the background.
Making It Work in Any Season
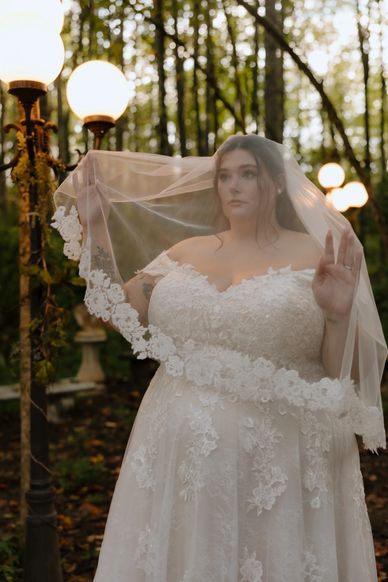
Outdoor photo sessions are not limited to perfect summer evenings. Some of my favorite shoots have been in light rain, under overcast winter skies, or even in the wind. The key is to embrace the conditions rather than fight them. Rain can create moody reflections. Overcast light is incredibly flattering for skin tones. Wind can add movement to hair and clothing. When you stop worrying about ideal conditions and start working with what you have, your images gain character.
If you are planning your first outdoor session, start simple. Pick a location you know well, choose a time of day with good light, and keep the session short. Thirty minutes to an hour is plenty for a single person or a small family. As you gain confidence, you will learn to read the light and the environment faster, and you will start seeing opportunities where you once saw problems.
For those in the Tri-Cities area looking to book a session, Captures by Chloe Kingsport Photographer, located at 5613 Carters Vly Rd, Church Hill, TN 37642, USA, and reachable at +1 423-302-0594, offers portrait and event photography services that make use of the region's natural beauty. The business focuses on creating relaxed, genuine images that reflect each client's personality, and outdoor sessions are a core part of that approach.